SPRO is a boilerplate of predefined Gulp tasks. The mission is to set up the development environment for your project without writing Gulp tasks again and again. In this article, I am going to show you how to configure SPRO for custom WordPress theme development.
If you want to learn more about SPRO, read the introduction article from the last week.
The video lesson
If you prefer watching a video over reading an article, you could proceed to the Skillshare lesson that I recorded for this occasion.

The project structure
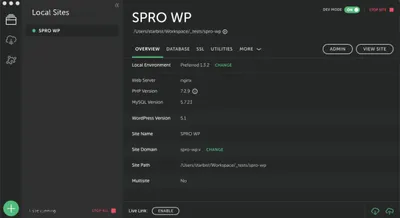
I am going to use a default WordPress installation as my starting point. I am using Local by FlyWheel as my WordPress development tool.

The aim is to add Gulp tasks to TwentyNineteen default theme for Sass, JavaScript, BrowserSync, and Critical CSS.
I have reorganized the code in the theme. First, I have created a new folder called css and moved all Sass files and sass folder in it. Next, I have created a new folder called src, and moved newly created css folder and existing js folder in the src folder.
The project structure looks like this:
|-- src
    |   |-- css
    |   |   |-- style.scss
    |   |   |-- ...
    |   |   |-- sass
    |   |       |-- _normalize.scss
    |   |       |-- ...
    |   |-- js
    |       |-- customize-controls.js
    |       |-- ...
SPRO installation
To install SPRO, run npm install starter-project-cli -s command, and then run SPRO by executing node_modules/.bin/spro start command. SPRO is also available for global installation. Now you should be prompted to answer questions about the project architecture and Gulp tasks.
Here are my (shortened) answers:
    GENERAL | Do you want to override the project? Yes
    GENERAL | What is the root folder of the project? ./
    GENERAL | Where is the folder with the source code of the project? src
    GENERAL | Where do you want to store compiled code of the project? build
    GENERAL | Are you sure that you want to override the project? Yes
BROWSERSYNC | Do you want to run BrowserSync to preview changes in the browser? Yes
       HTML | Do you want to run HTML tasks? No
        CSS | Do you want to run CSS tasks? Yes
        CSS | Are you using Sass? Yes
        CSS | Where is the folder with CSS source code? css
        CSS | Where do you want to store compiled CSS code? css
        CSS | Do you want to minify CSS code? Yes
        CSS | Do you want to autoprefix CSS code? Yes
        CSS | Do you want to add sourcemaps for CSS code? No
        CSS | Do you want to lint CSS code? No
         JS | Do you want to run JavaScript (es6) tasks? Yes
         JS | Where is the folder with JavaScript source code? js
         JS | Where do you want to store compiled JavaScript code? js
         JS | Do you want to minify JavaScript code? Yes
         JS | Do you want to add sourcemaps for JavaScript code? No
         JS | Do you want to lint JavaScript code? No
     IMAGES | Do you want to run image optimization tasks? No
      FONTS | Do you use local fonts? Do you want to run font tasks? No
    FAVICON | Do you want to run favicon tasks? No
   CRITICAL | Do you want to extract Critical CSS? Yes
   COMPRESS | Do you want to compress (gzip) all assets? No
        KSS | Do you want to add KSS style guide? No
    SASSDOC | Do you want to add documentation for the SASS code (SassDoc)? No
      JSDOC | Do you want to add documentation for the JS code (JSDoc)? No
     SEMVER | Do you want to add semver versioning tasks? No
       YARN | Do you use Yarn as your default dependency manager? Yes
After the installation, SPRO would copy Gulp tasks and configuration files in the gulpfile.js folder.
To be able to run Gulp tasks, we should install all required dependencies. You could find the installation command in your terminal, right after the questions. Paste the command in your terminal, and hit Enter.
SPRO configuration
Now that we have all required Gulp tasks and dependencies, we could configure SPRO.
Let's start with BrowserSync. I want to use the BrowserSync to preview the changes in the browser. Local by FlyWheel tool have configured the local site domain for me. In my case, it is spro-wp.v. I am going to use the local domain as a proxy for BrowserSync.
{
  "proxy": "http://spro-wp.v"
}
Next, we should update the URL for extracting Critical CSS to match our development domain in the .critical.json file.
[{
  "src": "style.css",
  "settings": {
    "out": "style.critical.css",
    "url": "http://spro-wp.v/",
    "width": 1920,
    "height": 1200,
    "keepLargerMediaQueries": true,
    "strict": false,
    "blockJSRequests": false,
    "phantomJsOptions": {
      "ssl-protocol": "any",
      "ignore-ssl-errors": true
    }
  }
}]
There are other options here, but the most important ones are src and out options. src option tells which file to use as our source file for extracting Critical CSS, and out option tells in which file should Penthouse store the extracted Critical CSS code. To learn more about Penthouse, visit the official Penthouse site.
Also, we should create a new Sass file in the sass folder called style.critical.scss.
Running the tasks
To view the list of available Gulp tasks, run gulp --tasks command. We have four tasks:
cleanfor cleaning the compiled code, and- three tasks for development:
dev,build, anddefault.
If you run default Gulp task, the site should open in the browser.
PHP updates
Since our compiled code is stored in the build folder, we should update the path for CSS and JavaScript files. In the functions.php file, update the twentynineteen_scripts function:
<?php
/**
 * Enqueue scripts and styles.
 */
function twentynineteen_scripts() {
  // Will load CSS file at the end of the page
  // wp_enqueue_style( 'twentynineteen-style', get_stylesheet_uri(), array(), wp_get_theme()->get( 'Version' ) );

  wp_style_add_data( 'twentynineteen-style', 'rtl', 'replace' );

  // Will update the path to the JavaScript files
  if ( has_nav_menu( 'menu-1' ) ) {
    wp_enqueue_script( 'twentynineteen-priority-menu', get_theme_file_uri( '/build/js/priority-menu.js' ), array(), '1.1', true );
    wp_enqueue_script( 'twentynineteen-touch-navigation', get_theme_file_uri( '/build/js/touch-keyboard-navigation.js' ), array(), '1.1', true );
  }

  // Will update the path to the print CSS file
  wp_enqueue_style( 'twentynineteen-print-style', get_template_directory_uri() . '/build/css/print.css', array(), wp_get_theme()->get( 'Version' ), 'print' );

  if ( is_singular() && comments_open() && get_option( 'thread_comments' ) ) {
    wp_enqueue_script( 'comment-reply' );
  }
}
?>
We are removing the main style file, and we are updating the path to the JavaScript and the print CSS files.
In the footer.php file, add a link to the main style file just before the closing body tag:
<link rel="stylesheet" href="<?php echo get_theme_file_uri('/build/css/style.css'); ?>">Ideally, we should defer the loading of the uncritical CSS file, as suggested by Google.
Critical CSS
Next, let's inline Critical CSS in the head of the HTML document, in the header.php file.
<?php
$critical = get_template_directory() . '/build/css/style.critical.css';
if ( file_exists( $critical ) ) {
  echo '<style>';
  require_once $critical;
  echo '</style>';
}
?>
If you followed the instructions correctly, you should be able to run gulp command in your terminal. Gulp should compile the code, then open the site in the browser, then extract the Critical CSS and then refresh the browser.
Conclusion
As you could see, I have never touched any of the Gulp tasks, just configuration file. This is exactly what SPRO is all about.
If you have any feedback, it would be appreciated. SPRO is in its early stages, and more features could be added soon.
Please spread the word. More lessons are coming soon!